Showing posts with label Desserts. Show all posts

Monday, January 23, 2012

Mexican Wedding Cookies

I first tried these cookies in December when Alyssa received them during the blogger cookie swap. Although, I had never tasted them before, apparently many others have. My boyfriend said that they reminded him of cookies that his mother used to bake during his childhood in Turkey.  Friends that tried them said that the cookies tasted similar to desserts that are typical to Italian cuisine. I will call them Mexican Wedding Cookies here but maybe you know them by a different name?

These cookies taste light and sweet and salty at the same time.  The saltiness of the butter stands out for me when I eat the cookies and I quickly decided that I would make a batch for myself.  The cookies are really easy to make and I am really happy with the way that they turned out.  Considering that they are common across various cultures, I hope to try different variations of this same recipe and search for my favorite!


Makes about 20-24 cookies

3/4 cups shortening
1/4 cup butter
(alternatively substitute the top 2 ingredients and just use 1 cup of butter)
1 teaspoon salt
2 tablespoons vanilla
1/2 cup powdered sugar
1/2 teaspoon cinnamon
2 cups AP flour
1/2 cup chopped pecans

1.  Preheat the oven to 325 degrees.  Line a large baking tray with parchment paper.

2.  In a large bowl, blend together the butter, shortening, salt, sugar, vanilla, and cinnamon.

3.  Add the flour and the pecan and mix until they are incorporated.  (The batter will be dry and crumbling).

4.  Take teaspoons of batter and shape them in your palm so that they stay together.  Place the cookies on the baking sheet and bake for 20-22 minutes.

5.  Sprinkle powdered sugar on top of the freshly baked cookies.

Enjoy!

~ Rona


Wednesday, January 18, 2012

Apple Cinnamon Rolls

I remember when I was younger and we took family trips to the mall.  There were some days when we would order a large cinnamon roll from Cinnabon and go home and share it between four people.  Now, when I walk past Cinnabon in a mall food court, I must admit that the smell does tempt me but when I think about all the calories packed into one small dessert, I manage to resist.

However, I came across this recipe on a blog, I could caved in to my Cinnabon craving!  This roll seemed like the prefect combination of sweet without too many calories. Since I always have a supply of puff pastry in my freezer, I made these the very next morning for breakfast.  With the baked apple in the middle they are almost like a mix of an apple pie and a cinnamon roll.  Seriously, it was the perfect breakfast.  I want to make them again and share...so I don't end up eating all of them on my own!


Adapted from the Food Coma.

Makes 9 rolls

1 sheet of puff pastry
1 apple, peeled, cored, and chopped into thin, long pieces
1/4 cup butter
1/2 cup powdered sugar
1 teaspoon cinnamon

1. Thaw out your puff pastry ahead of time, in the refrigerator. 

2. Preheat the oven to 375 degrees.  Melt the butter in a bowl and use a pastry brush to coat the unfolded sheet of puff pastry.

3.  In a small bowl combine half of the powdered sugar and the cinnamon.  Sprinkle the sugar and cinnamon mixture onto the puff pastry.

4.  Place the apple slices at one end and roll up the puff pastry into a log shape.  Cut into one inch thick pieces and place on a baking sheet.

5.  Bake for about 20-25 minutes, until the dough is golden brown.

6.  Make a glaze for the rolls by mixing together the remaining melted butter with the remaining powdered sugar.  Pour over the rolls when they first come out of the oven and serve warm.

Enjoy!

~Rona


Monday, January 16, 2012

S'mores Cheesecake

I had been thinking to make cheesecake from scratch for some time now.  I was a little bit discouraged because Alyssa and I tried to make cheesecake a year ago and failed.  We had expected the process to be simple but somehow the filling did not work and we had to throw it out.  But hey, you never learn if you don't try, right?

Well, in a recent trip to Costco I bought a 3 pound brick of cream cheese.  I eat half a bagel for breakfast several days a week but there was no way that I would be able to finish that monster sized cream cheese on just bagels alone.  So yesterday I finally gathered myself and decided to make a cheesecake.

I had purchased graham crackers and marshmallows recently thinking to make s'mores but came up with the s'more cheesecake idea instead.  I took the filling recipe from the cream cheese box, found the graham cracker crust recipe online, and just decide to throw in the marshmallows and chocolate to spice it up.  Granted this could have been a disaster considering that I had not successfully made cheesecake before but luckily it came out well.

What I learned from the experience is that the marshmallows will bubble up and they come through the cream cheese.  Not a problem for taste but not the best for presentation.  I think that using mini-marshmallows instead of these jumbo ones would solve that.  Also, the cake was a little sweet for me, perfect with unsweetened tea, but sweet when eaten alone.  I think that chopping the chocolate more finely and using less of it would take care of that.  But the good news is that I have finally overcome my fear of making cheesecake and failing!  Now, I just hope this wasn't a fluke and my next cake will taste just as good! 


S'mores Cheesecake
Makes one 9-inch cake

For the crust:
1 1/2 cups of graham cracker crumbs
5 tablespoons of melted butter
3 tablespoons sugar
1 tablespoon of cocoa powder

For the s'mores filling:

Marshmallows
1/4-1/2 cup of finely chopped chocolate (depending on how much you like chocolate/sweetness)

For the cheesecake cake filling:
1 pound of cream cheese, softened
1 teaspoon of vanilla extract
1 cup sugar
2 eggs

The Crust:

1. Preheat the oven to 325 degrees.  In a medium sized bowl, mix together the cocoa powder, sugar, and graham cracker crumbs.  Pour the melted butter over the mixture and toss with a fork until the crumbs are moist.

2.  Pour the crumbs into a 9 inch springform pan.  Press the graham cracker mixture over the bottom and on the sides to form an even thickness crust.  Bake for 10 minutes and then transfer the pan into the fridge to cool.

Cream Cheese Filling:

3.  In a large bowl combine the vanilla, cream cheese, and sugar.  Using an electric mixture, beat the mixture together to soften the cream cheese.

4.  Add the 2 eggs and mix on low speed until the mixture is combine.

The Cake:

6.  Take the pan out of the oven and line the bottom of the crust with marshmallows (I had large ones so I tore them in half and covered the crust).

7.  Sprinkle the bottom with the chopped chocolate.

8.  Pour the cream cheese filling on top of the marshmallow layer and spread it evenly across the cake.

9.  Bake at 325 degrees for 40 minutes, until the center of the cake has solidified (with the marshmallows coming through it may not look solidified but I took it out after 40 minutes and the cake was perfect).

10.  Cool the cake in the refrigerator for 2-3 hours before serving.

Enjoy!

~Rona

Sunday, January 8, 2012

Russian-Style Napoleon

When it comes to sweets, I'm much more of a savory girl myself. I'd usually choose the bag of salty chips over the cupcake, but there's something about Napoleon that I can't resist. The Napoleon I usually eat is from local Russian food stores, but of course every culture has embraced this cake (with good reason.) Recently, my mom has started to make her own simple version of Russian-style Napoleon which is what I have for you here today. It's simple to make, as are a lot of the recipes I post, so I highly recommend trying it!


Exhibit A: Layers of cream upon cookies upon cream upon more cookies.


Ingredients

1 pack Kedem tea biscuits
1 large egg
1/2 cup sugar
1 cup cold milk
1 tbsp flour
Vanilla extract
Jameson Irish Whiskey (doesn't specifically have to be Jameson)
2 tbsp butter


Procedure

To make cream for Napoleon: 

1) In a medium sized bowl, whisk together sugar and egg.

2) Add the flour and 1/3 of your cold milk, and continue to whisk.

3) Boil the remaining 2/3 cup of milk in a medium-sized sauce pan. When the milk is boiling, add the sugar mixture from the previous steps and simmer until the mixture thickens. Be sure to constantly stir the mixture, but do not let it boil. The mixture thickens fast so this step should only take a few minutes.

4) Remove your creamy mixture from the heat, and add a few drops of vanilla extract and a bit of whiskey for additional flavor. Add your butter and mix until the butter melts.


To make Napoleon layers:

1) Lay out a 3x3 base of cookies in a rectangular dish and spread the cream over it. Repeat this step for two more layers of cookies, making a total of three layers. You should have used 27 cookies. The resulting piece of cake will be about 8'' by 5".

2) To make the cake more decorative, crush 2-3 biscuits that remain in your pack and spread the crumbs over the top layer of cream.

3) Let  the cake cool in the fridge for a few hours before serving. For aesthetic purposes, you can trim the uneven edges of the cookies, but this is not necessary.


See--piece of cake! (Hah.)


~Alyssa

Wednesday, January 4, 2012

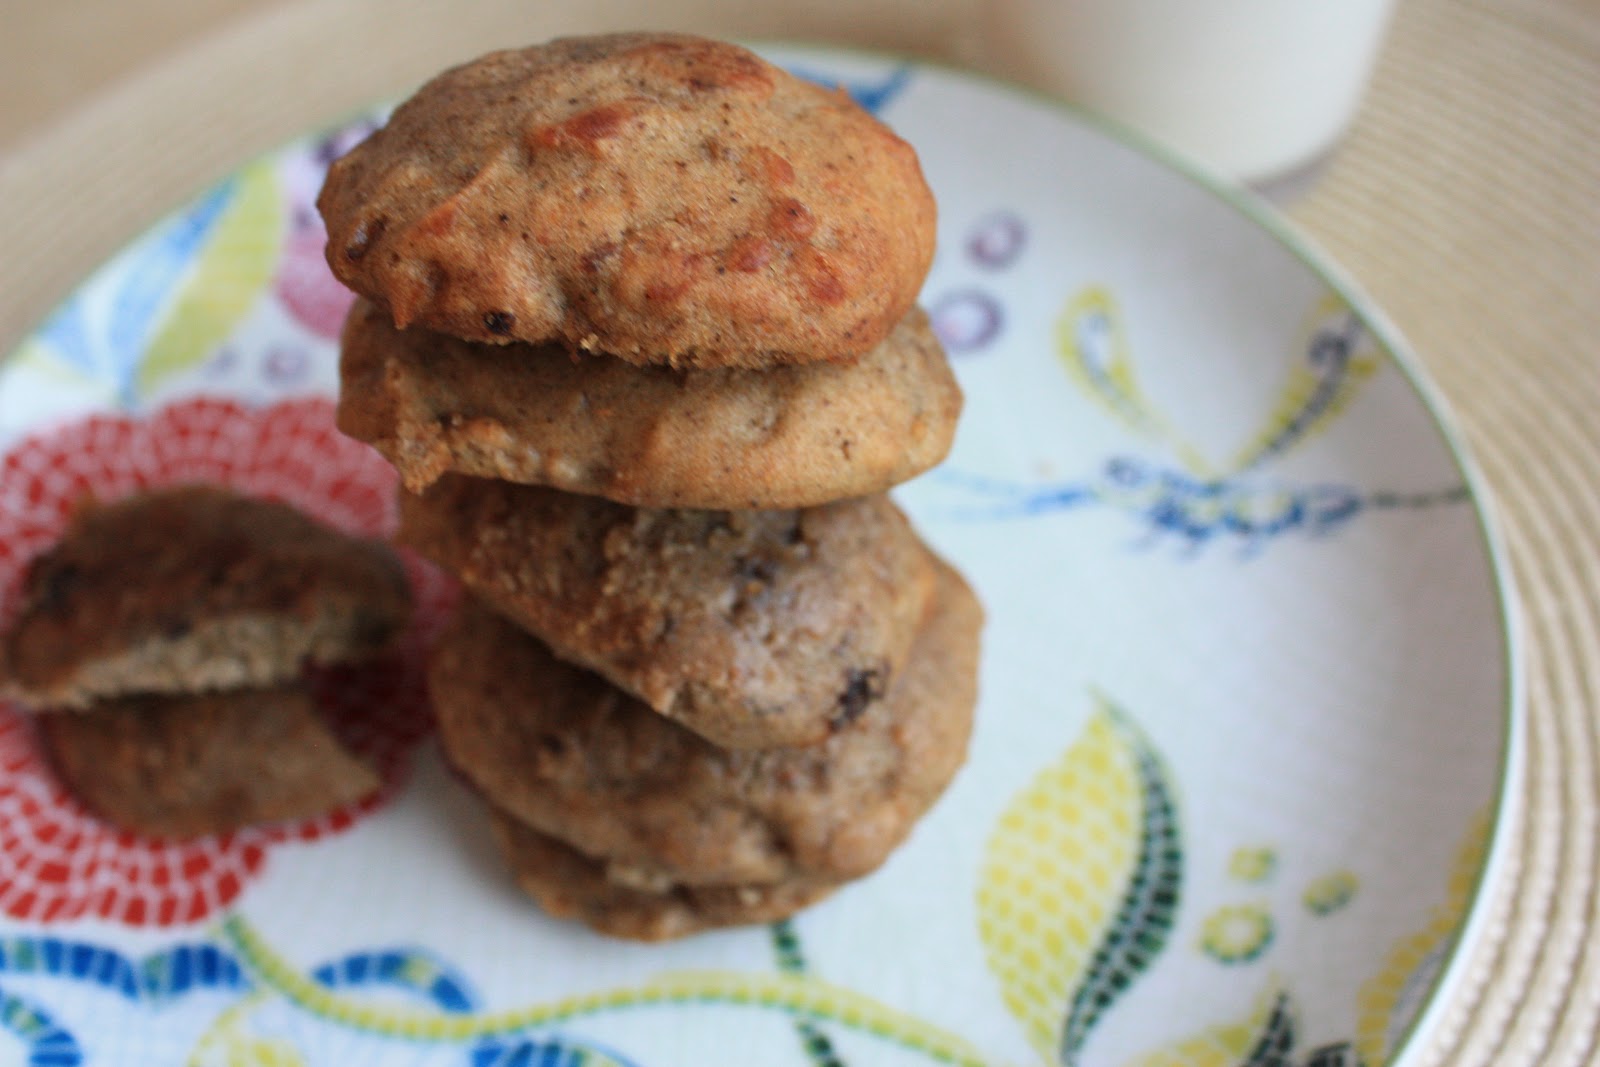
Persimmon Cookies

My mom loves persimmons but they are only in season for a few short weeks in December and January.  As soon as December rolls around she is on a mission to find as many persimmons before their short season comes to an end.  Sometimes we end up with so many that is just not possible to eat them all before they start spoiling.  When they start to get too soft and black spots start appearing on the skin, I know that they are perfect for persimmon cookies! 

The recipe for these cookies was adapted from a sticker that is sometimes placed on persimmons in stores.  I actually have several stickers that I kept over the years hiding in random places.  I had never made the cookies before but I am really happy with the results.  They are soft and sweet and have just the right amount of spices.  Best of all, they are easy to make and have a melt in your mouth quality to them.  I want to make them again with the last few persimmons of the season!


Makes about 32 cookies

1 cup persimmon pulp (from 2 large persimmons)
2 cups AP flour
1 teaspoon baking soda
1 teaspoon cinnamon
1 teaspoom nutmeg
1/2 teaspoon cloves
1/2 teaspoon salt
1/2 cup margarine or butter
1 egg
1 cup sugar

1.  Preheat the oven to 350 degrees.

2.  Dissolve the baking soda in persimmon pulp and set aside.

3.  Sift the flour, cinnamon, cloves, nutmeg, and salt together and set aside.

4.  Cream together the butter and sugar until fluffy and then beat in the egg.

5.  Stir all three mixtures together until combined.  Drop teaspoons of the batter onto a well greased baking sheet.  Cook for 10-12 minutes until the edges of the cookies are just starting to brown.

Enjoy!

~Rona

Monday, December 19, 2011

Candy Cane Cake Pops

The funny thing about sharing a blog with your sister is that I am usually just as surprised as you are to see what Rona posts. I mean it happens more often than you'd believe. We don't live together and don't coordinate recipes, so it's pretty exciting for me to see what she has made. This happened a few weeks ago when I saw that she made cake pops. First, after getting sad that I am not close enough to go to her place to eat them, I decided the only solution would be to try a variation of cake pops myself.


Fun side note--these cake pops were also featured on the Chloe and Isabel blog here!

Ingredients

1 box white cake mix
3/4 cup milk
3 eggs
1 teaspoon vanilla extract
1 cup vanilla frosting (store bought or homemade)
1/2 cup crushed candy canes
Crushed candy canes, red sprinkles, and red frosting for decoration
Lollypop sticks


Procedure

1. Mix the cake mix, milk, eggs, and vanilla extract. Pour into a greased 9x13 baking pan. Bake at 350 degrees for 25-30 minutes until the cake is cooked throughout.

2. Let the cake cool completely. Crumble the cake into small, even pieces and place in a large bowl.

3. Add the vanilla frosting and the crushed candy canes to the cake and mix until a thick dough consistency forms.

4. Shape the dough into evenly sized cake bites and cool in a refrigerator for 1-2 hours, or in the freezer for 20 minutes.


5. At a low heat, melt white melting chocolate. Insert a lollypop stick into each cake bite and dip into the chocolate. Decorate the pops and leave them in the refrigerator until the chocolate hardens.

6. Share the cake pops with family and friends!


Thanks for reading :)

~Alyssa

Thursday, November 17, 2011

Raspberry Cheesecake Cake Pops

I love the idea of a bite sized dessert so I made these over the weekend.  I bought a cake bite book and cookie sticks recently and I was really excited to try a recipe.  These cake pops are really easy to make, the recipe calls for a box of cake mix.  This is a great recipe for people who do not like to bake or are baking beginners!

I was a little bit worried about using a cake mix, I think that boxed cake mix has a distinct flavor to it.  I considered making my own yellow cake but I just ran out of time.  Luckily, I found that the cake still tasted great.  When combined with the raspberries and the cream cheese, I couldn't even tell that it was from a mix.

The only other tricky part was coating the cake pops in chocolate.  I tried to melt white chocolate at first but it burnt easily and became lumpy.  Definitely not what I was looking for!  Luckily, I had milk chocolate on hand.  I put it in an aluminum bowl on top of a tea kettle.  I let the boiling water from the tea kettle melt the chocolate and I added 2 teaspoons of vegetable oil.  By removing the chocolate from direct contact with the heat, it did not burn and maintained a smooth consistency. 

I used sticks to stick into the dough and to dip into chocolate, giving it more of a candy-like feel.  But you can also use a fork to dip the dough into chocolate and make these into cake bites!  And of course there are endless ways to decorate them!  I think that these are such a fun treat especially for any upcoming holiday parties!


Makes between 24-30 cake pops

1 box white or yellow cake mix
3 eggs
1 cup milk
1 box (8 oz.) cream cheese, softened
1/2 cup fresh raspberries, mashed (or frozen raspberries, thawed and squeezed dry)
1 pound of white or milk chocolate
1-2 teaspoons of vegetable oil

1.  Preheat the oven to 350 degrees.  Grease a 9x13 baking pan.

2. In a large bowl, mix the cake mix, eggs, and milk together and pour it in a baking pan.  Cook for 20-25 minutes until the cake springs back when touched.

3. Remove from the oven and let the cake cool completely.  Remove any brown or burnt spots and crumb the cake into small pieces and place them in a bowl.

4.  Add the raspberry cake cream cheese to the cake mixture and mix together until a thick dough forms.

5. Shape into evenly sized cake bites and cool in the refrigerator for 1-2 hours.

6.  Melt black or white chocolate over boiling water.  Mix in 1-2 teaspoons of vegetable oil and keep the chocolate warm to maintain a smooth consistency.

7.  Insert the cake stick into the dough and dip it in chocolate.  Place the cake pops on parchment paper and chill in the fridge until the chocolate hardens.

Enjoy!

~Rona

Friday, July 8, 2011

No Calorie Friday: Cappuccino Cookies

I just ate way too many cookies, all before eating an normal meal for the day.  Isn't that the beauty of cooking for yourself? Eating your meals in whatever order you want.  

For today's no calorie Friday, I decided to make a chocolate cookie.  These are low-fat, do not contain too much butter or sugar, all things that I look for in a perfect cookie.  Personally, I hate the idea of being tempted by a dessert and consuming 1/3 or more of your daily calorie intake from that one treat.  These cappuccino cookies do not take a long time to bake and they come out really soft and not too sweet, perfect for eating with tea or coffee.


Ingredients
makes about 32 cookies

1/3 cup butter or margarine, softened
1 cup packed brown sugar
2/3 cup unsweetened cocoa powder
1 tablespoon of dry instant coffee
1 teaspoon baking soda
1 teaspoon ground cinnamon
2 egg whites
1/3 cup low-fat vanilla yogurt
1 1/2 cups all-purpose flour
1/4 cup power sugar

1. Preheat the oven to 350°F.

2. In a large bowl, beat the butter with an electric mixture until soft.

3. Add the brown sugar, cocoa powder, coffee granules, baking soda, and cinnamon.  Beat until combined.

4. Add in the egg whites and yogurt and beat until combined.

5. Add in the flour and beat until combined.

6. Take about one tablespoon of dough and roll into a bowl.  Dust the dough with powered sugar.  Place each cookie on a baking tray, about an inch apart.

7. Bake for about 10 minutes until the surface is firm.

Enjoy!

~R

Friday, July 1, 2011

No Calorie Friday: Orange Yogurt Muffins

Well after another long and painful week, I am done with summer courses and am now two classes closer to a masters degree!  There is not much to say other than a sigh of relief...I can finally enjoy summer!

I think that we all need a no calorie Friday this week because 4th of July is all about eating and relaxing. So I am starting the long holiday weekend off with a batch of muffins.  I made them smaller, more of a cupcake size so they are perfect for a  small snack.  Best of all the recipe is very easy and quick to make.  The result is a very delicious treat that is a perfect mixture of sweet and citrus-flavored especially when they are still warm from the oven. 


Ingredients
makes 12 small muffins

1 3/4 cups all-purpose flour
1/2 cup sugar
2 teaspoons orange zest
1 teaspoon baking powder
1/2 teaspoon baking soda
1/4 teaspoon salt
1 egg
1 8-oz container of honey yogurt (or another sweet flavor)
1/3 vegetable oil
1 teaspoon vanilla
1/2 cup sifted powdered sugar
1/4 freshly squeezed orange juice

1. Preheat the oven to 400°F.  Line a 12 muffin cup tray with baking cups.

2. In a large mixing bowl, combine flour, sugar, orange zest, baking powder, baking soda, and salt.  Make a well in the center of the mixture and set aside.

3.  In a medium mixing bowl, combine egg, yogurt, oil, and vanilla.

4. Pour the wet mixture into the center well of the dry mixture and stir until the batter is just moistened.

5.  Spoon batter into the muffin cups.  Bake for 18-20 minutes.

6.  While the muffins are baking combine the orange juice and powdered sugar to create a glaze.  Drizzle the glaze over the warm muffins and serve immediately.

Happy Fourth of July Weekend!  I hope that it is filled with fun, relaxation, and good food!

~R

Friday, June 24, 2011

No Calorie Friday: Carrot Cake


After the end of a long week and anticipating another long one ahead, I was craving something sweet.  The only problem is that baking doesn't allow for small portions and although I share what I make with my boyfriend it still means that I end up eating half of a high calorie dish.  While I would consider making up for the increased calorie intake with extra exercise- meaning running through Central Park- there is just not enough time in the day to negate the dessert calories.

As a solution to this problem, I remembered a story told by my mom. She was complaining that her coworkers were bringing in too many cookies, cakes, and doughnuts on Fridays. In response to her complaint, her coworker told them not to worry about all the desserts because calories don't count on Fridays.

And so, with this idea in mind, I introduce No Calorie Fridays!  A day for indulging and making whatever desserts my heart desires. I hope that you enjoy these days and find some inspiration in the recipes.


My first dessert is carrot cake.  I recently bought a lot of carrots and so the idea of carrot cake jumped into my head.  I used a recipe from the food network and modified it a little by adding pineapple chunks to the cake.  I wanted to make it sweet while using slightly less sugar and to also make the cake moist.  The result is perfect.  A soft moist cake with just enough cream cheese frosting to balance it.  I want to eat slice after slice.


Ingredients
Cake
Unsalted butter for the pan
2 1/2 cups, all-purpose flour
6 medium carrots, grated
1 teaspoon baking powder
1 teaspoon baking soda
1/2 teaspoon ground allspice
1 teaspoon ground cinnamon
1/2 teaspoon freshly ground nutmeg
1/2 teaspoon salt
1 cup sugar
1/4 cup dark brown sugar, firmly packed
3 large eggs
3/4 cups plain yogurt
3/4 cups vegetable oil

Cream Cheese Frosting
12 ounces cream cheese
2 ounces unsalted butter, room temperature
1 teaspoon vanilla extract
2 cups of powdered sugar
 

1. Preheat oven to 350 degrees F. 

2. Butter a springboard cake dish.

3. Mix the flour, baking powder, baking soda, spices, and salt in a large bowl.

4. Add in the carrots and mix until they are covered in flour.

5. In another bowl mix the sugar, brown sugar, eggs, and yogurt.  Then slowly add in the vegetable oil and mix until combined.
6. Combine the wet mixture with the dry mixture and stir until just combined.

7. Pour into the cake dish and  bake on the middle rack of the oven for 45 minutes. Reduce the heat to 325 degrees F and bake for another 20 minutes.

8. Remove from the oven and let the cake cool.  When it is cooling, prepare the cream cheese frosting.

9. When the cake is cooled, cut it into two equal parts.

Cream cheese frosting

10. Use an electric mixer to combine the cream cheese, butter, and vanilla.

11.  Slowly mix in the sugar.

12. Spread the cream cheese in between the two cake pieces and frost the rest of the cake.

Enjoy

~R

Monday, May 9, 2011

Cheesecake Brownies

Alright, so I am smack in the middle of finals period. And if I am to admit a secret about my studying routine, I am a stress eater. Meaning, that during finals, when I am studying all day, I feel that I need to constantly eat in order to keep my energy level high enough to study.


Last semester, I had a day where I did not eat a meal, just snacks all day (not very satisfying). In order to avoid this type of situation, I have tried to minimize the temptations available and I have severely restricted the amount of junk food that enters my apartment.


But by enters, I really mean the junk food that I buy. This rule conveniently does not apply to what I can make from scratch.


This leads me to my next point...


Goodbye, any attempt at eating only healthy snacks...


Except for the fact that these are made with black beans...


Can you tell? Because the taste does not give it away!


And half of them will make their way to my last class of the semester for a snack day...


Welcome back, healthy snacks...


Cheesecake Brownies
 Makes about 20 brownies


Brownies
1 can (15 oz.) black beans, drained and rinsed
3 large eggs
1/3 melting butter
1/4 cup cocoa powder
1/8 teaspoon salt
2 teaspoons vanilla extract
1/2 cup sugar
1/2 cup of semi-sweet chocolate chips


1. Preheat an oven to 350° F and butter a baking pan.


2. In a the bowl of a food processor, combine the black beans, eggs, melted butter, cocoa powder, chocolate chips, salt, vanilla, and sugar. Blend until smooth.


Cream cheese topping
8 oz cream cheese
1 large egg
1 teaspoon vanilla extract
1/4 cup sugar


3. In a large mixing bowl beat the cream cheese, egg, sugar, and vanilla until smooth and creamy.


4. Pour most of the brownie batter into the pan and spread it evenly, leaving a small portion of the mixture. Pour the cream cheese mixture on top of the brownie mixture. 


5. Pour the reserved brownie mixture in various areas on top and use the handle of a wooden spoon to make a swirl pattern. Cook the brownies for 30-35 minutes.


Enjoy


~R